Tuesday, September 11, 2007

Ladies and Gentlemen, Please, would you bring your attention to me...

I think I've finally got it figured out.

From this point forward *crosses fingers* I should be posting directly to my website, using WordPress's lovely blog feature. I have set it up so that you don't need a special ID to post (though you can create one if you want), you can still comment, you can still see the art/yarn/woodworking, and I THINK you can even get an rss feed going.

If you would, please check it out and let me know how you like it, then bookmark it for future updates. I will continue to be a member of my LJ communities, of course, but will likely not post much of anything here from this point onward.

Eventually, I'll have divinebird.com point to the divinebird.com/wordpress/ address, but that's for when I have brain cells left to process the, uh, process.


Divine Bird Website Grand Opening!


Clicky!

Friday, September 7, 2007

Still Here!

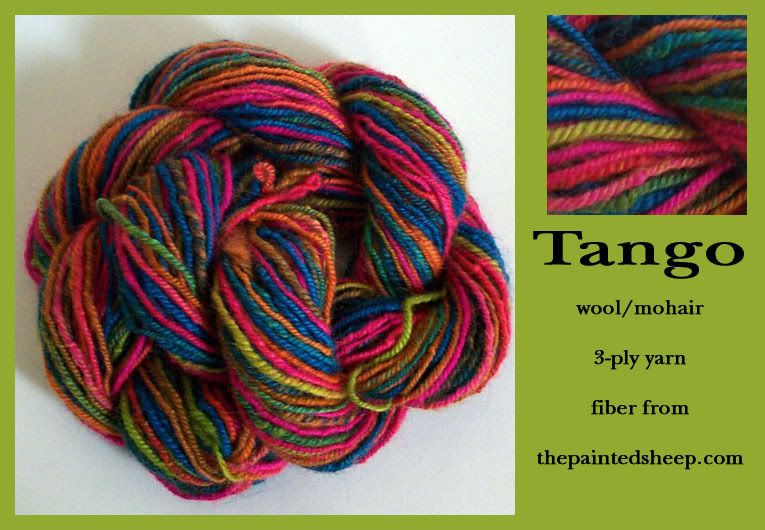
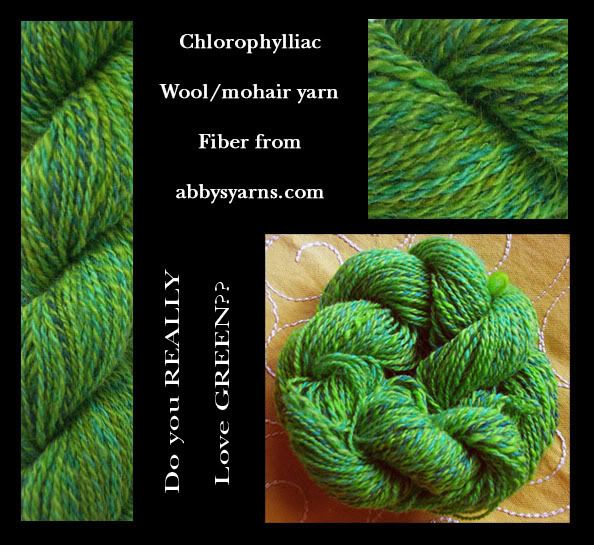
Wow, I have been a BUSY girl these days! Between getting a new job, spinning up a storm, and doing a demo at a local fair, I'm beat! I've spent the last couple of days photographing, arranging, and posting my latest yarns on my actual site. I thought about posting them here, but some of the collages are quite large. I don't want to break your screens, so check 'em out here: http://www.divinebird.com/textiles.html

I've also updated my Etsy shop with a whole bunch of the yarns pictured on my page! The crazy thing is that even MORE are coming...wait til you guys see the sock yarn that's on my wheel right now! It's fabu.

Tomorrow or Sunday, I'm dropping off my entries to the Big E skein contest (that's at the Eastern States Exposition, for you out-of-towners)...wish me luck. I've never entered yarn before! I planned to at this year's Massachusetts Sheep & Wool, but you may remember that I missed the deadline, making the Big E my actual first competition!

Speaking of which, I got the best compliment of all the other day. The guild member who told me about the competition is someone to whom I look up when it comes to spinning. When she heard that I had officially entered, she gave me a big grin and said happily, "Well, it's nice to know we'll actually have COMPETITION this year!" This is the kind of person who always places in these things, and rightly so. She and a couple of other guildmates usually compete and I think they've been hoping for some fresh competition. Though the statement could sound haughty to some, I know this woman, and I took it in the best way possible. If she thinks I can compete against her yarns, well...I feel better about entering now. :)

Ok, so I said I wouldn't post my collages here, but I can't resist a few. If they're too big, just go to my site and look at 'em there. :)


Ta!

Thursday, August 9, 2007

Success!

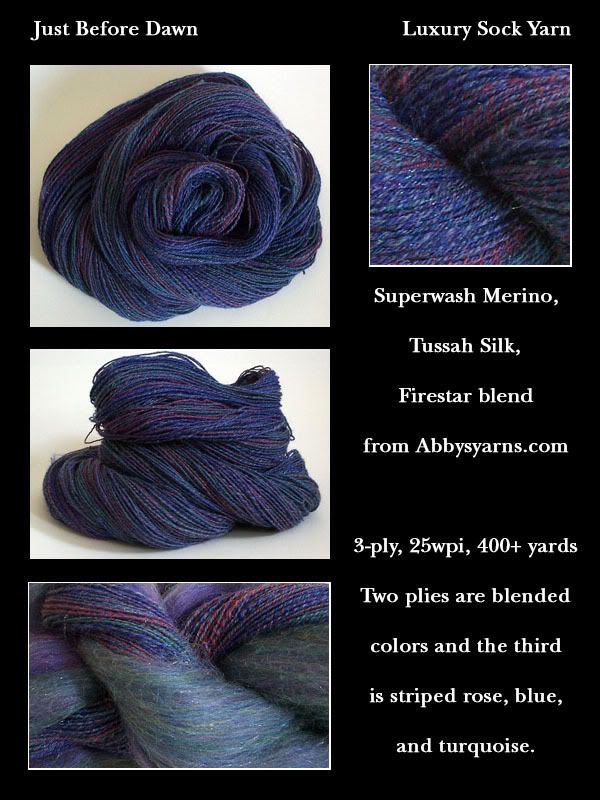
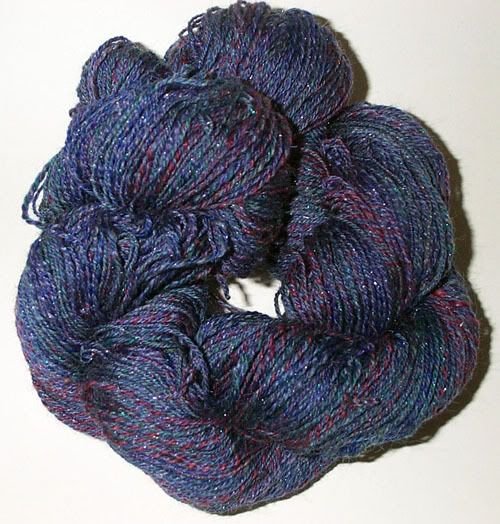
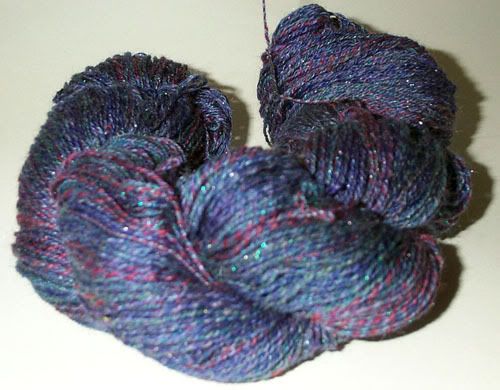
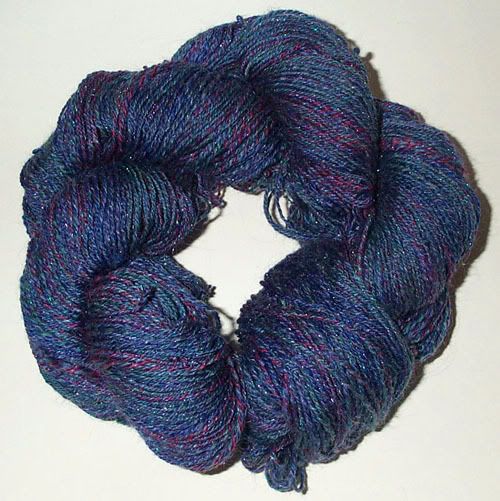
Pretty 3-ply yarn, spun from the July batch of Abby's Batt Club batts.

The process: spun 2 blended batts on separate bobbins, then spun the color-separated batt on a 3rd bobbin. Plied those 3 singles together.

The result: 430+ yards of 3-ply yarn, 26wpi, 3.75 oz.

The remaining batt: will be spun and chain-plied for heels & toes of socks. No, seriously, Abby, I will SO be making socks from this. ;)

The pics:


I hate how flash photography turns out, but this was the best I could do for the crappy light we had today. I will try to get better pics tomorrow.

I think this is the finest I've ever spun, and the most even yarn. This is for me.

Saturday, August 4, 2007

Yarn. Harlot.

Wow, so the evening was a mix of ups and downs that ultimately balanced out on the positive. I suppose you can't ask for much more in life, you know? I may go into detail later, but for now, here's the recap:

Went to see Yarn Harlot in Madison, CT at RJ Julia Bookstore. Of course she has a name (Stephanie Pearl-McPhee) but since I talk about like 8 million people here, I am not going to add yet another girl's name to the list. So she's YH for this entry. (Sorry, Steph!)

We got there about 20 minutes late due to waiting for someone who had specifically told me he'd meet us elsewhere (major mistake on my part and MAN am I sorry), trying to stop for gas at a gas station that was...closed(!)...and a set of the very worst directions I have EVER gotten from Google Maps. No, really. I have no clue why we ended up on back roads when there was a perfectly good highway nearby! Grr.

Still, we got to hear YH speak, and I got one good picture of her--because we were late, we sat on the floor almost at her feet. Here she is:


I tried to get a few others but they didn't come out. :(

So she finished her talk, and then everybody piled out of the room to get their books signed. I met up with Jenni and Briana, two more of my friends, and bought my book for YH to sign. We got in line to wait for the signing, dragged out our knitting, and just chatted for a bit.

Then this other girl came up to me and asked if my shirt was a Threadless shirt, which it was. And then it turned out she was on Ravelry. And so I brought out one of my Moo cards--the ones with my yarn on them--and I said, "awesome, friend me on Ravelry! I'm on there as Divinebird."

She blinked. "Are you a Yarnie?" she asked, and when I nodded, she said, "I need to give you a hug! OMG! I can't believe it's you!"

WTF? Someone recognized ME? Huh? Had she bought yarn from me before or something?

Turns out she was the recipient of a yarn swift I'd made. The moment she told me her screen name, I almost freaked out. What are the chances, really?? I hadn't thought about her being in the area, and I'd never seen a picture of her. Man, that ruled. So we all ended up at the back of the line, and I realized we needed pics all together. It was like Six Degrees of Yarn Harlot.

YH signed my book and chatted with us for a while, and then we got this pic (ignore my exhausted-hot-out-of-sorts expression--I wish I'd hopped to the back of the pic, for reals! And wtf is up with me looking taller than everyone?? I'm like 5'4".) of the whole group.


We all decided to go over to Village Pizza for dinner, as I had not eaten a real meal all day and it would give us a chance to hang out & talk. YH asked if we knew of a place to eat in the area. Props to Briana for immediately suggesting she come with us for the pizza. :) YH agreed, and we planned to meet over at the pizza place after she finished up some of her work at the store.

Briana was laughing at me when we walked down the street (we were on our way over to a new little tiny yarn store that had stayed open for the event) because apparently she's never seen me fangirl anyone before. I guess she's only seen me around people who, though famous in some way, don't impress me the way YH does.

To put it another way, Stephanie Pearl-McPhee is one of my personal heroes. Not because she's a funny writer who writes about knitting (though that does make her COOL), but because she uses her powers for Good. She never shoves it down our throats, but somehow she manages to convince her fans over and over again that Medecins sans Frontieres could use a few bucks. She turns her tour stops into opportunities for local shelters to receive hand-knitted hats before the winter. She raises our collective awareness of individuals and groups in need of help--monetary, emotional, and physical. She seems to do this as a matter of course, and that's an aspect of her personality that I would like to emulate. I always fall short, but it gives me something to which I can aspire. It's like thinking of others and how we can help in a tangible way is something that's second-nature to her, and through it all she remains an exceptionally cool chick who enjoys a drink and some pizza with absolute strangers.

So yeah, I fangirl her. I can't help it.

Meanwhile, back at the description of the evening...the wool shop was tiny. No, smaller than that. And it was warm. I mean, something like 8 people who are already warm from walking on a hot night suddenly pile into a small room filled with wool--that is a recipe for HOT. I grabbed a card, though, and I will def. stop back in next time I'm in the area. When I'm not distracted by personal heroes and heat and a strong desire for food.

The Village Pizza folks were lovely and very tolerant of our taking over the middle of their restaurant, half an hour before they closed for the night. We hung out, had some food, drank some birch beer, and generally had some nice conversation. I do hope I didn't make too much of a fool of myself (see above fangirling) though Melissa and Lilith said I wasn't too bad. ;)

After YH left to go back to her hotel, we headed out ourselves. We made a quick stop for gas (at a gas station that WASN'T closed, take THAT, other gas station!) and water at a grocery store, then got on the highway.

I don't get down to Madison often. On average, I go once every year or two for specific events. I don't know the area well, or oh, which exits to take on the way home. I somehow missed the exit for Rte 9 and didn't realize it until I'd gone about 20 minutes past it. We got our bearings again, turned around, and went BACK to the right exit. Once back on track, we didn't have any problems the rest of the way home.

This was totally going to be a short entry but I guess there's no way to talk about the evening in ten words or fewer. I kicked myself all night about missing Aaron, because that really was my fault, but there wasn't anything I could do by the time we connected. Lilith DID say later, "Jenny, next time we go to see YH, we are leaving TWO HOURS EARLY."

Sounds like a plan.

Sunday, July 22, 2007

Oh, and furthermore...

For the non-yarny folk, here is a cute picture of my newest CHOCOBO. He is winking, and walking, and he has a little feed bag. He is SO CUTE.


That is all.

Bag, v.2.0

This is a VERY LONG POST about the process I used to design a new knitting/sewing/drawing bag; I will try to title further entries about the process the same way I did this one, so you non-yarny/textiley folks can skip it (or at least be WARNED). ;) --JBB

ETA: Now with 100% more pics!

Last year, I designed what I hoped would be THE ultimate knitting/sewing/drawing bag for myself. I used some black twill, some gorgeous cotton printed with Chinese horses, and a few metal findings I'd been hoarding for some time. While I still love the bag, it never really gelled as THE bag for me. I know this because I took the strap off to use on something else a couple of months ago, and never put it back. The bag has since been sitting unused in my bedroom, which means it's time to attempt an upgrade.

This entry is mostly for my use & my notes, but I know many of you sew, and some of you who don't sew have wondered what goes into planning a project. You'll notice that I am not using a premade pattern. While I have a huge collection of them and could probably find an easier one to get my desired result, I wanted to do this entire thing from scratch. This may make me a sucker for punishment, but this also allows me to sell my work later, or even sell my design. Everything here came about through my observation of how the hardware works, what I want and need from my bag, and my particular aesthetics. This design is also not for reproduction (though I highly encourage you to use the process) or sale except by me, because man, I did a lot of math for this. :)

The Process

Before I did anything else, I made a list of the things that I did & didn't like about Bag v.1. I came up with the following:

Good:

  • LOTS OF POCKETS
  • washable
  • sturdy
  • large enough for multiple projects
  • easy to transport
  • got to use fabric from stash
  • able to use for spinning, sewing, knitting, crochet, and even artwork
  • specialized pockets: needles, pens, folders/patterns, phone/wallet/etc, medical & emergency
  • very roomy
  • color scheme was very striking: black outer fabric, brown/blue/red/black fabric inside, red zippers

Bad:
  • no structure, falls down
  • flap gets in the way
  • strap never properly made
  • strap pulled bag out of shape every time
  • hard to get into bag when carrying it
  • too many pockets--collected junk & weighed bag down
  • black fabric shows dust, kitty fur, sand, lint, fuzz from yarn, etc.
  • black fabric is boring
  • clips for strap kept getting twisted or caught
  • didn't usually bother to close zippers, making them unnecessary
  • hard to transfer projects out of bag; had to dig in pockets to find things

This list was mostly in my head; I started to think about the things I would do if I made a new version for myself. From the above items, I was able to get a better idea of what I wanted from my next bag:

  • Plenty of pockets, but now most with assigned uses (to cut down on clutter)
  • No zippers (not really needed)
  • No flap over main opening
  • Matching removable small notions bag
  • Matching drop spindle bag
  • Mylar sheets in sides & bottom for structure & shape
  • Fabric interlining for extra body, nice sleek feel
  • Defined, clean-lined, vertical design
  • Stay open when I want it to
  • Want to use "Rowan" fabric from England for lining
  • Must be washable, or at least dry-cleanable
  • Must be able to carry multiple projects, like old bag
  • Convertible from hand-carry to shoulder-carry
  • Most importantly, must look like "me"


Materials

After all that thinking, I finally started to write & draw things on paper--partly to get them out of my head. I like to sketch out designs on large paper using woodless colored pencils. They're like China markers, except there's no wood or paper to seal them; think of conte crayon with a plastic casing to protect your hands. I like them because I can use different colors to edit my drawings, keep layers straight, and define sections without redrawing the whole thing each time. I use a large 18x24 spiral-bound drawing pad for paper; it allows me to flip to different pages without earlier ones falling out, and later I can go back to refer to the drawings if I need to.
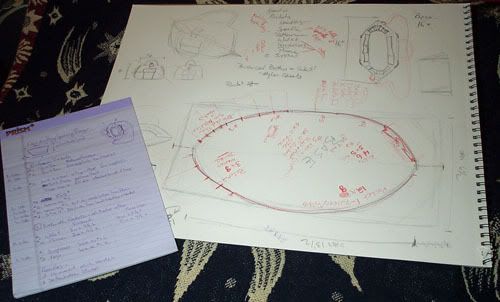

Pic: the sketchy notes

I have a multi-step process for creating the actual pattern pieces. This helps me figure out the basic shapes needed to make my sketch into a 3-D object, how they will be placed on the fabric I have to work with, and allows me to fix my math BEFORE I ever put scissors to cloth. Once I have the design sketched out, I will grab some graph paper, note that each square=1", and draw out some boxes. I don't worry too much about the pieces' overall shape yet, since I just want to see the area required and to see how the pieces relate to each other. I don't worry about seam allowances either, yet.
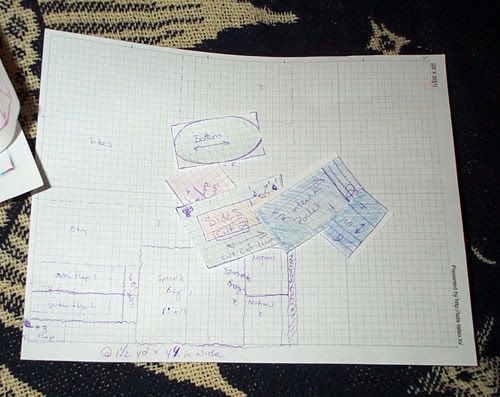

Pic: graph paper & little pieces

Once the pieces are graphed out, I color them different colors (orange for interior pockets, green for sides, etc) and cut them out. A second piece of graph paper becomes my fabric. It's like setting out a pattern for a Barbie doll at this point. I arrange them in the tightest formation possible (adding a rough estimate for seam allowances) and then it's time to move on to full-size graphing.
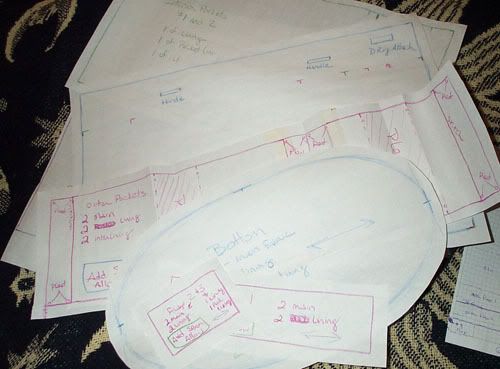

Pic: Large pieces, cut out with notes

At this point, there are two ways I can go. I will either grab a Sharpie, my cardboard cutting board and a bolt of nonwoven interfacing, or I'll use my colored pencils with a giant easel pad pre-graphed with 1" squares. Since I am doing a bag and the pieces aren't too big, I chose to use the easel pad this time. Using the small pieces as a guide, I drew out the first piece: the side of the bag. I had planned for the bottom to be 13" long, and the top edge to be 16" long, giving me the shape I wanted. Out of curiosity, I noted where all the pockets would go on both sides, the handles, the d-rings...and something felt wrong.

This is why I draw things out many times. I had forgotten that my 13" base was an oval, NOT a straight seam. When thinking about the shape of the bag, I had pictured a soft, flat-bottomed V. The piece was shaped like an upside-down trapezoid, which worked with my mental image. However, the pieces wouldn't have added up when I sewed them together if I had left them that way. In order to go around the edge of the oval, I would need to have a 16" bottom edge! Therefore, if I wanted the final bag shape to be that flat-bottomed V, I would need the side piece to be a rectangle, NOT a trapezoid. The trapezoid would occur when the pieces were attached and viewed in 3-D.

The above doesn't make sense to you? No worries. Just so long as you understand that my math was off for that one line--which meant I went back over the rest of the entire pattern just to make sure nothing ELSE was out of sync. I re-drew that piece, then the rest, and cut them out after making notes on each one about how many I needed to cut out of each fabric.
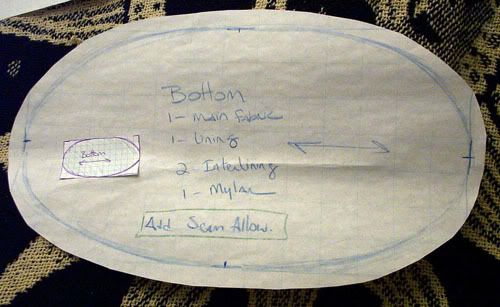

Pic: Pattern piece comparison. The tiny piece is the original graph paper version.

The Actual Design

This bag evolved around the piece of hardware I'll be using as a closure. It's a 16" "snap purse frame", which opens up into a six-sided lozenge shape. I have been wanting this kind for some time because it stays open on its own. It's the type used for carpet bags and such. When closed, it's 16" but when open, it's 13" long and 7" wide. I envisioned a trapezoidal bag that would become a rough cylinder when open. The bottom is a long oval, and there are only two pattern pieces for the upright sides (meaning there aren't gussets or shaped sides, like my old bag had).

There would be two pockets on each broad side, with unsecured flaps and box pleats; one would be 8" and the other 3", for wallet, phone, keys, sunglasses, etc. These would be lined with the same fabric as the interior of the bag.

Inside, I plotted out seven pockets. On the right side, pocket 1 would hold patterns even if they were in pocket folders, and then the remaning section (pocket 2) would be divided at every inch for tall knitting needles. On the left, pocket 3 would be pleated with a flap, to hold extra 'supplies' and a pillbox for emergencies. Pockets 4, 5, and 6 would be the same size but without pleats or flaps. Pocket 7 would be shorter; this and #6 would also be divided at each inch for holding pens, crochet hooks, and small knitting needles.

Even with all these pockets, I think the bottom will remain uncluttered. Between the structure of the Mylar and the overall shape of the bag, I think this time the center will stay roomy and open--no matter how full the pockets end up! I have only two small sections that haven't been 'assigned' a use, so I can use them for holding my business cards or a small notebook. They're small enough that even if I try to throw yarn labels, receipts, or test projects in there, I can't take too much.

Notions & Accessories

To carry the bag, I will be looking for a pair of arch handles that are 6" between the ends. I may make them myself if I can't find some I like, but I plan to do a lot of looking around. I might go with leather ones depending on the outer fabric. There will also be a 'D' ring attached securely at the right corner on both sides of the bag so I can add a shoulder strap. I wanted to keep this as simple as possible: one strap, attached at either end on opposite sides. It should maintain the balance of the bag without affecting the hardware.

The hardware will be hand-sewn into a casing made from the main body fabric. It will be added after the mylar inserts go into the sides, probably after the handles are added. I will reinforce the seam with grosgrain ribbon, also hand-sewn in.

While I work on this bag, I will be making some accessories as well. I have always wanted a spindle bag for my drop spindle; I have seen them at my local Guild meetings and it seems like a much nicer alternative to the plastic bags I've been using up til now. I have enough of the lining fabric left over to make a few, so I might just do just that. I will also be making a removable notions bag out of the same combination of fabrics, styled somewhat after my current one, which is a zippered makeup bag. I might monogram them both, just because I want to do some embroidery.

Fabrics

As I mentioned above, I know for a fact that I want to use my "Rowan" fabric for the lining. It's a lightweight calico cotton printed with blue and lavender knitting swatches, needles, and balls of yarn. I bought it on Ebay from a woman in the UK, which is the only place it seems anyone can find this line. I have about a yard, and it's 60" wide--PLENTY for the project and then some. I knew when I got it that I wanted it for a knitting bag someday.

Unfortunately, I don't have a specific outer fabric in mind. I think I'd like it to be one of the colors of the fabric, or at least a complementary color. Naturally, I'm thinking greens right now, which honestly wouldn't be bad. If I can find a nice bright--but not too acidic--green or green & yellow fabric, I think this would be a really pretty bag that would look nice at least two seasons of the year. One idea I had was to use some velveteen I have in my stash. I have a sagey green and a nice buckskin tan; I can envision the tan as being a nice neutral counterpoint to the busy calico. It would also give some additonal structure overall, which again, this bag seriously needs. I might use the green velveteen for my practice bag.

Interlining will be of plain white cotton muslin, pre-shrunk and ironed. I'll baste it to each pattern piece and treat it as one with the fabric. I thought about iron-on interfacing, but I like the look more of an independent layer. I used this technique when making bodices, which were very stuctured, shaped garments, and it was always easy (for me at least) to tell when I used it and when I didn't.

Back to the Present...and Future

Now I'm armed with the design, some ideas for fabrics, and most of the hardware & notions I'll need. I will add updates as I work--at this point, there may not be many if I can get to the fabrics I'm thinking of using & I can clear out my sewing area again. I WILL be making a practice bag, as noted above, which will let me tweak the design further and experiment with the fabrics, textures, etc. before cutting into my hard-to-get "Rowan". If this works, I might consider adding them to my Etsy shop or giving them as gifts.

I'll also note if I change things; the handles might end up being switched with a different style, or pocket sizes may adjust...whatever.

Comments? Suggestions? Questions? Been there, done that, don't do X? PLEASE let me know. :)
Monday, July 16, 2007

ConnectiCon is OVER

How would you like some pics?

http://flickr.com/photos/divinebird/collections/72157600855121801/

View as a slideshow and you'll see 'em all. These are just the photos of my friends & my table; the rest of the cosplay is coming soon.

However, there were a couple of characters who had something to say to some of you...


Drakon, Cendri, you know these guys? ;)

Much love. More coming. Now, I go get breakfast with some of the money I earned at Con. :D

Wednesday, July 11, 2007

Aeris


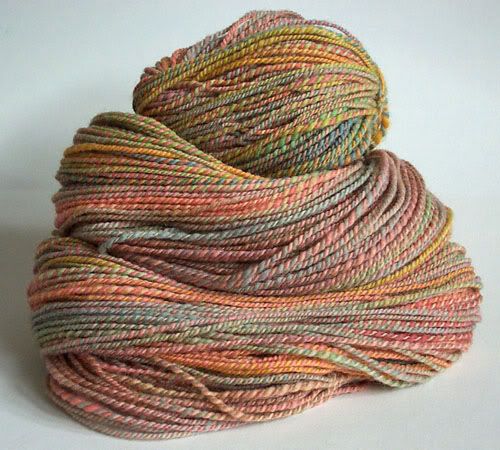
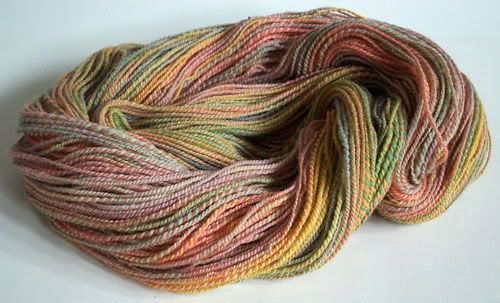
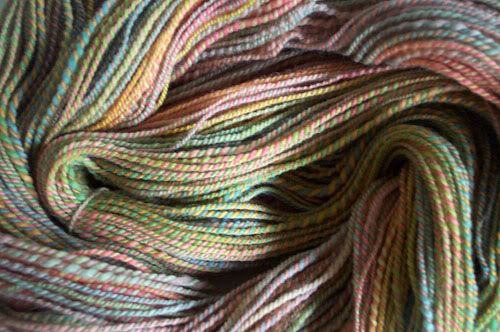
Some new yarn for ya.

I got the fiber from Street Legal Designs during one of Jo's awesome sales. I'm not really a rainbow person, despite my obsession with color, so when I opened the package I remember thinking, 'what possessed me to buy this?' However, the fiber was very very soft and dense, and the colors were pretty, if not 'me'. I brought it with me to show my uncle & aunt how my spinning wheel worked.

Once started, I just went ahead and finished it the following day. I gotta say, the singles were UGLY. I mean I was sitting there, spinning, wondering again what I'd gotten myself into. There was so much...PINK! And the colors didn't seem to do anything for each other, either. There were, however, spots that I thought lovely, and I suppose that's what kept me going.


As you see, the resulting yarn reveals NONE of these color flaws. I did a simple center-pull ball and plied the ends on themselves, and this is what I got. 240+yards of soft, smooth wool, in muted, transitioning colors that run up and down the plies. If I had any clue of a project to do with it, I'd save it for myself, but I bought it with the intention of selling whatever yarn I spun it into, so...there we go.


The yarn is called "Aeris" after one of my favorite characters in Final Fantasy VII. Aeris was a flower-seller who wore a pink dress; the main pink in this yarn is actually a perfect match to the official art of the character. :) The other colors are obviously flowers, and there's a wonderful couple of sections where the pink is plied with a pale green, which is a significant color that you'll get if you've played the game.


I'll be offering this at ConnectiCon this weekend, and if no one buys it then, I'll put it up on my Etsy shop.

In other news, I've done some knitting & crocheting:

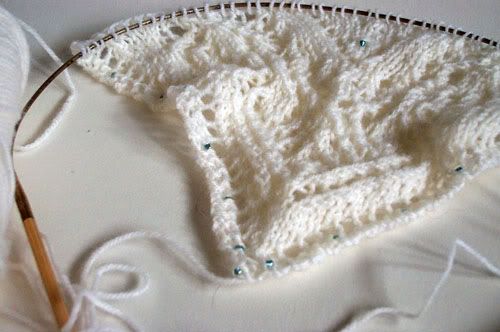
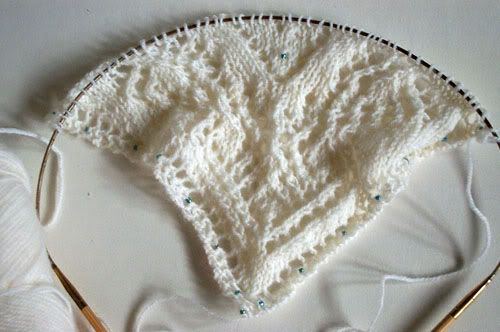
The ubiquitous Mystery Stole 3:


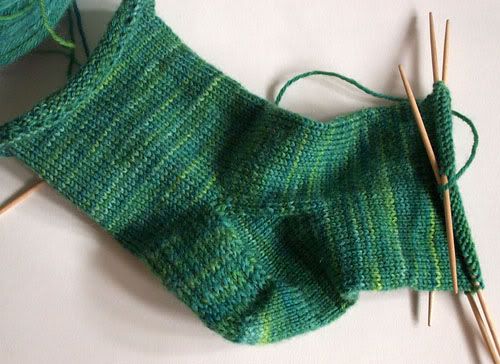
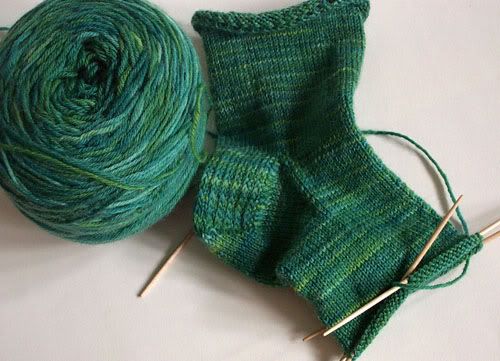
A pair of green socks (still on the first one):


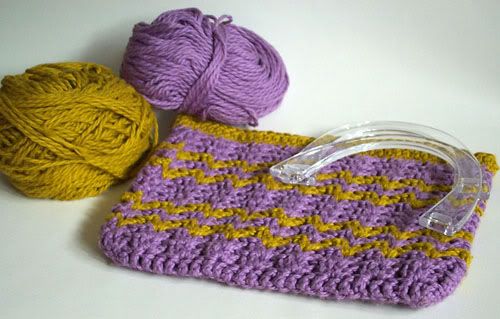
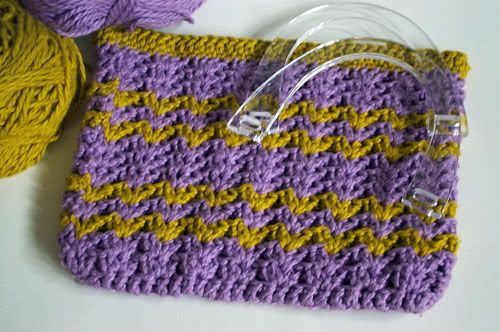
And a purse for myself, crocheted out of some organic cotton:


What have you been up to?

Oh, the Ravelry!

Yep, I finally got my invite to Ravelry, the new online community for knitters, crocheters, and other yarny folk. The site is still in beta, so they're still on an invitation-only basis. If you haven't yet, go to the main page and sign up for the waiting list. I waited a few weeks--almost a month--to get in, but they're adding people by the truckload every day now. Check out ALL of the screenshots, too!

Here's the link for the folks who are already there: My Profile

This means that I've also fleshed out my account on Flickr, so if you're there, please add me as a friend! I'm Divinebird on both sites, and though I've added a few people I knew off the bat, I'm certain there are more of you out there.

ConnectiCon is this weekend, which means I'll be incommunicado for a few days. Here's hoping some of my prints sell, some of my yarn sells, and I drive a bit of traffic toward my website. :D